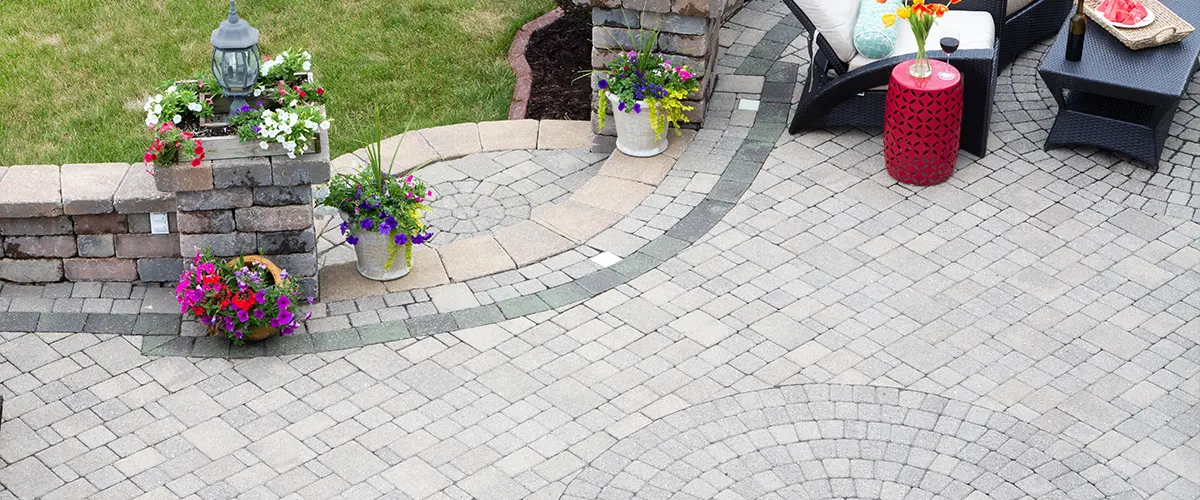
Brick patios are some of the best looking patios you can get for your outdoor space, but they’re also more difficult to install than, say, a concrete patio.
If you’re planning to get a brick patio upgrade for your landscape, there are several things you need to consider before starting this project.
From the planning phase to finishing up your project, let’s see what it takes to build a brick patio!

Planning
As with any home improvement project, planning requires extensive knowledge, expertise, and time.
You’ll have to:
- Determine the size of the brick patio.
- Choose the right place for it.
- Think about what design you want.
- Determine how many materials you'll need.
The Size
The size of the brick patio is a major factor that’ll impact the total cost of your project. A larger patio implies more materials, more labor, and more time.
The Place
You probably already have a place in mind, but you have to think about existing underground pipes and cables that you risk damaging when doing the digging.
To ensure you keep your house’s utilities running, contact your gas, electricity, and water providers to ensure you won’t hit any pipes. Besides this, you’ll also need to think of how well the water will drain from your patio.
The Design
The design of your patio is what will make it stand out. It’s what can uplift the looks of your outdoor space, or break it if done poorly.
Note: Some design patterns require more effort than others. Some bricks will need to be cut in half, some will have to be different sizes, and some won’t work for a border. Make sure the brick surface you choose will complement the rest of your outdoors.
Some popular designs for patios are:

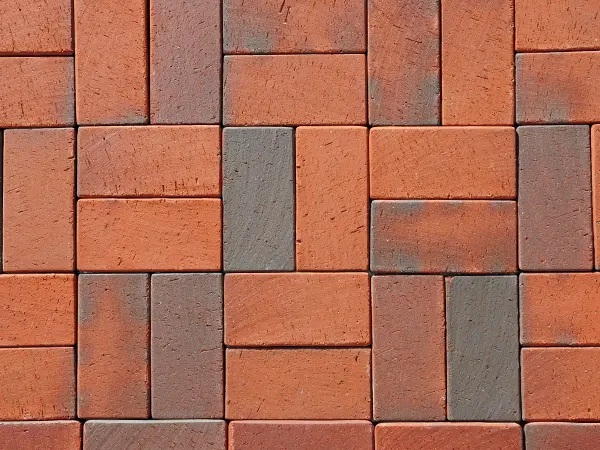
Basket Weave
Bricks are laid horizontally and vertically in pairs to create the basket weave pattern.
The basket weave layout works especially well on large patios, because it breaks up large expanses.

Running Bond
A running bond pattern involves laying your square or rectangular pavers in a linear, side-by-side pattern, but staggering every other row.
It’s similar to the classic subway tile look.

Herringbone
The herringbone pattern is a glorified zigzag.
Diagonal rows of bricks alternate directions to create this traditional, formal design.
Brick Patio Or A Different Patio?
Based on your needs, preferences, and budget, you’ll have to think of the right materials for your patio.
A brick patio can be more expensive than a concrete patio, but more affordable than a flagstone patio.
A dry brick patio costs $4 to $8 per square foot. A wet brick patio with cement to hold the bricks together costs $6 to $12 per square foot. Concrete pavers cost between $4 and $6 per square foot.
While the brick material is important, the design you choose will also impact the total cost.

Supplies, Materials, And Tools
When building a brick patio, you’ll need several tools and materials.
Materials
- Crushed patio stones or gravel will improve the ground's stability and will help with drainage. At least 4 inches of crushed stone should be enough to ensure a strong base level.
- Sand is necessary to place the bricks in place, fill in the gaps, and the spaces between the bricks (if you're not using cement).
- A landscape fabric underneath everything helps keep the weeds out of your patio. It can become a real chore to remove weeds from between the bricks, so stopping them from the get-go will save you a lot of time and effort.
- As borders, pressure treated lumber is a good option, since the wood will be in contact with water and wet ground constantly. You could still use bricks on the edges, but we wouldn't recommend this.
Tools
If you hire a professional landscaper, they’ll definitely have all the necessary tools to ace your project. If not, you’ll have to hire or rent the tools, which can be quite expensive, especially when you have no experience with them and you’ll have to learn.
At Land Designs By Colton, we are equipped with the best tools and expertise to get your brick patio done in time and on budget.
You’ll need:
- brick hammer
- sand
- shovel
- push broom
- tamper
- garden stakes
- rake
- masonry saw
- sand or concrete screed
- wheelbarrow

A Brick Patio Building Process
Let’s see what it takes to build a brick patio in terms of labor and building.
1. Measurements
Steak out the corners and sides. Use a mason line to ensure the patio will be straight. Also, leave a gap along the outside edge of the bricks for the border. We recommend lumber, but pavers are still a viable option.
2. Digging
This is one of the main reasons a patio project is not suited for DIYers. Older homeowners prefer hiring landscapers from the start, but many people call us after they realized how difficult building a brick patio is.
If you want to add gravel and sound, you’ll need a depth of 8 inches. If you’re okay with giving up the gravel’s stability and only use sand, four inches should be enough.
It’s important to slope the ground to encourage the water to run away from the foundation of your house. If you’re planning to use pavers as borders, a cool trick is to dip a little deeper at the edges of your patio so you can stand them up on end.
3. Tamp The Ground
For smaller patios, you can tamp the ground with a 4 x 4 post or a manual tamper, but if you’re building a larger patio, this won’t be the most efficient option.
4. Lay Down The Gravel
About 4 inches of gravel should be enough for a brick patio to be 100% functional and long lasting. Follow the slope of the ground and be sure to maintain it. After you place the gravel, you’ll need to tamp it again.
After you tamped the gravel and ensured you still have the desired slope, place the landscaping fabric to prevent the growth of weeds.
5. Install The Border
If you’re using lumber, screw the boards together and place them around the patio. This ensures an even better stability and will keep the gravel and bricks in place.
If you’re using pavers, stand them on the edge and place them at the edge of the patio. Remember, you’re making your life easier if you dig a little deeper on the edges when using pavers as borders.
Use a level to ensure the boards are straight and even.
6. Add Sand
Two inches of sand should be enough to form a nice bed to place the bricks. Level off the sand and make sure you keep the desired slope. To avoid any excess sand, you can use a level and a soft broom to adjust it accordingly.
7. Place The Brick Pavers
When the sand is leveled, start laying the bricks. Place them as close to each other as possible, and use a rubber mallet to fix them in the sound.
Use a small level to check the bricks, but a longer level to check the entire slope. If you’re not looking to obtain a slope, ensure you have a perfectly flat surface.
8. Add Sand Again
Add another thin layer of sand over the brick patio and start brooming it between each brick. Only do this after all the bricks are in place, otherwise you might end up creating an uneven ground that will cause the bricks to move around.
After you made sure you filled every crack, spray some water with a garden hose on your patio area. This will help the material settle between the bricks.

Conclusion
If it sounds complicated, know that it is. Not only do you need the design expertise and the right measurements, but you’ll also need a lot of time and physical effort.
A brick paver patio is a great outdoor project that can raise your property’s value, but will also make your outdoor space a lot more welcoming and beautiful.
If you want to get a great brick patio that you know will last for many years without moving around, your best bet is to hire a professional landscaper in Colorado to do it for you.
Our experts at Land Designs By Colton will make sure your brick patio tops your expectations. You’ll get a simple and quick process where you and your needs are at the front and center of our work.
